Table of Contents
ToggleA kitchen island anchors the heart of the home, it’s where breakfast happens, assignments gets done, and holiday meals come together. Choosing the right countertop for that island shapes how it functions and how long it lasts. A butcher block top brings warmth, character, and surprisingly practical durability to kitchen islands while remaining more forgiving on the wallet than granite or marble. Whether you’re renovating a tired kitchen or building an island from scratch, understanding what butcher block offers, and what it demands, helps you make a smart, lasting choice.
Key Takeaways
- A kitchen island with butcher block top offers durable, warm-toned aesthetics that improve with age, though it requires consistent maintenance to prevent water damage and staining.
- End-grain butcher block construction is naturally resilient against denting, and minor dings actually fade as wood expands and contracts with humidity changes.
- Hardwoods like maple and walnut outperform softer woods; select 3-inch-thick material to maximize durability and reduce warping in your island countertop.
- Proper installation includes leaving 1/8-inch clearance around edges and using stainless steel fasteners that allow wood movement, preventing cracks from seasonal expansion.
- Monthly oil conditioning with food-safe mineral oil keeps a butcher block island hydrated and water-resistant, while daily wipe-downs protect against permanent damage.
- Butcher block pairs seamlessly with any kitchen style and costs significantly less than granite or marble, making it a practical choice for budget-conscious renovations.
Why Choose a Butcher Block Top for Your Kitchen Island
Durability and Longevity
Butcher block earns its reputation in professional kitchens for good reason: end-grain wood is genuinely durable when treated properly. The tight, compressed surface resists denting better than flat-grain lumber, and minor dings actually disappear as wood naturally swells and shrinks with humidity. High-quality butcher block, typically 3 to 4 inches thick with edge-joined or end-grain construction, can handle decades of use.
That said, durability depends entirely on care. Butcher block is not impervious to damage: water left sitting on the surface will eventually cause swelling and rot. Bacteria can live in cracks or stains if the wood isn’t sealed and maintained properly. This isn’t a drawback if you understand upfront that your island countertop is more like a wooden cutting board than a tile counter, it requires respect and attention.
Aesthetic Appeal and Design Flexibility
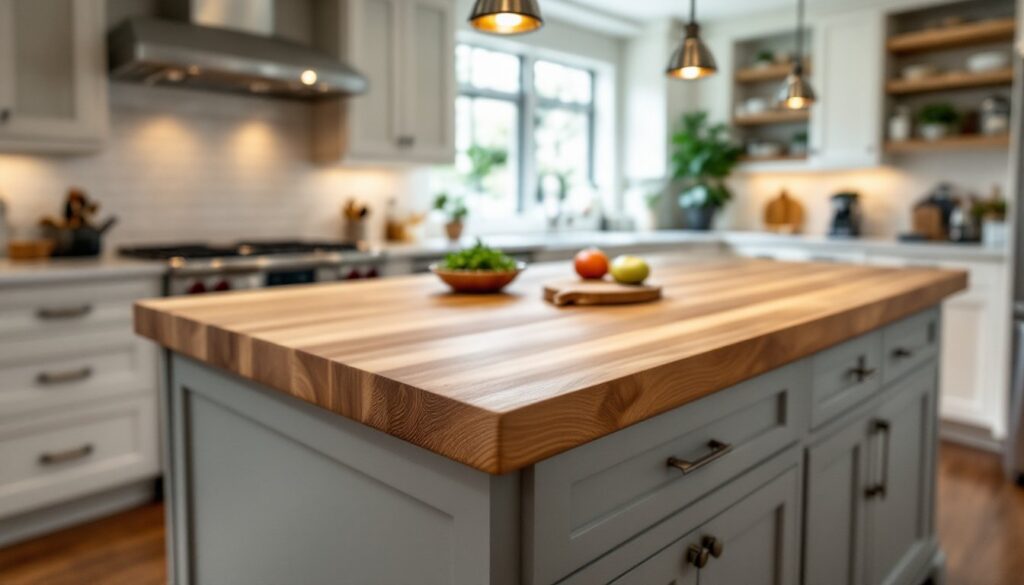
Butcher block delivers the warm, lived-in aesthetic that white subway tile and stainless steel can’t match. The visible grain and slight color variation create movement and depth, making even a simple island visually interesting. Unlike solid stone, which locks you into a palette, butcher block pairs easily with virtually any cabinet color or hardware style, rustic farmhouse, sleek modern, traditional, or eclectic.
The material also feels forgiving. Scratches, patina, and minor stains develop character over time rather than screaming neglect. Homeowners often find this honest aging appeals to them far more than the perfection-or-disaster binary of high-gloss finishes. You can also customize stain color and finish to match your specific design vision, and refinishing is straightforward enough for a dedicated DIYer.
Selecting the Right Butcher Block Material and Style
Not all butcher block is created equal. Commercial-grade butcher block, edge-grain wood glued and pressed in a factory setting, offers the best stability and appearance. Most homeowners source this through home centers or specialty lumber suppliers rather than a local butcher shop, though artisan options exist if budget allows.
Wood species matter. Hard maple and walnut are traditional choices: they’re dense, take stain evenly, and wear gracefully. Softer species like pine or fir cost less but dent more easily and demand extra sealant attention. Oak sits in the middle for price and durability. Tropical hardwoods like teak or cumaru resist moisture exceptionally well but command a premium and raise sustainability questions, research sourcing if this matters to you.
Thickness and width affect both appearance and function. A 3-inch-thick top looks substantial and resists warping better than 1.5-inch stock. Island width depends on your layout, but typical islands run 24 to 36 inches deep: butcher block slabs come in standard widths, so you may need to purchase oversized stock and trim or join pieces. Seams are unavoidable on wider islands, a good installer matches grain direction carefully to minimize their visibility.
Finish type is critical. Food-safe mineral oil, beeswax, and specialized butcher block conditioners seal the surface and enhance grain. Polyurethane topcoats offer more water resistance but look plastic-like and can’t be easily refreshed. Many DIYers prefer the natural look and easier maintenance of oil finishes, accepting that reapplication is part of routine care. Understand your preference before purchasing: some retailers pre-finish slabs, others sell raw wood ready for on-site finishing.
Installation and Mounting Considerations
Installing a butcher block island countertop is a solid DIY project if your base cabinet is sturdy and level, but it requires patience and accuracy. Start by confirming the island base is square and level, measure diagonals to catch any twist. Wood expands and contracts with seasonal humidity, so leave 1/8 inch of clearance on all sides where the countertop meets walls or cabinets: this prevents buckling when the wood moves.
Better to work with a fabricator if the island requires custom edge banding, complex seams, or integrated sink openings. A professional can also advise on local building codes: some jurisdictions have food-contact surface requirements, and certain stains or finishes may not meet health department standards. Budget $300 to $800+ for custom fabrication depending on complexity and local market rates.
For a ready-made slab, secure it to the base with stainless steel L-brackets or tabletop fasteners, not permanent adhesive or screws that prevent wood movement. Mount fasteners into the cabinet frame, not directly through the countertop surface. This allows the wood to shift slightly without cracking. Use a circular saw or miter saw to cut any trimming needed: make relief cuts on the underside if installing around a sink to prevent future splitting. A gathering kitchen island with professional-grade plans can guide your base construction if you’re starting from scratch.
Maintenance and Care Tips for Longevity
Daily maintenance is straightforward and becomes habit. Wipe spills immediately with a damp cloth, don’t let liquid pool or soak in. Dry thoroughly afterward: a terry cloth folded into quarters works better than a sponge, which traps moisture. For sticky residue or food particles, warm soapy water and a soft brush clean effectively without damaging the finish.
Monthly or quarterly conditioning, depending on climate and use, keeps the surface hydrated and prevents cracking. Apply food-safe mineral oil with a lint-free cloth, working along the grain, then buff away excess with a clean cloth. This refreshes the patina and maintains water resistance. Avoid harsh cleaners, bleach, and abrasive scrubbers: these strip finish and can lighten or darken wood unevenly.
Address stains and odors promptly. Baking soda paste removes light discoloration: for stubborn marks, lightly sand with 120 to 150-grit sandpaper in the direction of the grain, then re-oil. Red wine and coffee stains fade with time and regular conditioning. Onion or fish smell disappears if you wipe the surface with salt or white vinegar, then rinse and dry immediately. Heavy staining or deep burns may require professional refinishing, sanding and re-oiling runs $400 to $800 depending on island size.
In humid climates, watch for cupping or slight warping at edges. This is often reversible: increase oil application frequency, ensure proper ventilation around the island, and avoid placing the island directly under air ducts or radiators where humidity swings wildly. Resources like The Kitchn and Fix This Build That offer practical troubleshooting guides when problems arise.
Conclusion
A butcher block island countertop rewards thoughtful selection and honest maintenance with decades of warmth and utility. Choose the right wood species and thickness for your climate and use, mount it correctly to allow for natural movement, and commit to simple ongoing care. It’s not a set-and-forget surface, but that’s precisely why many homeowners love it: a kitchen island finished in butcher block feels genuinely lived-in, improving with time rather than declining into regret.