Table of Contents
ToggleA kitchen island serves as the heart of modern homes, a place to cook, gather, and eat together. But here’s the reality: without proper seating, it’s just a work surface with traffic. Kitchen island seating transforms that counter into an actual dining destination, letting family and guests pull up a chair while you’re prepping dinner. Whether you’re renovating an existing kitchen or building an island from scratch, getting the seating right requires balancing comfort, space, materials, and style. This guide walks you through everything you need to know to choose, measure, and install island seating that actually works for your home.
Key Takeaways
- Kitchen island seating transforms your counter into a social hub that improves family interaction, increases dining capacity, and enhances home resale value.
- Measure 36 inches of clearance (floor to overhang) for counter-height stools and allow 24–30 inches per seat to ensure comfortable, functional island seating.
- Metal frames, sealed hardwood, and performance fabrics outperform standard materials in kitchens due to resistance to moisture, heat, and daily wear.
- Bar stools (24–26 inches for counter-height, 30–32 inches for bar-height) are the most popular and flexible option for island seating, with or without backrests and swivel bases.
- Secure stools with lag bolts into solid cabinetry and ensure built-in benches rest on structurally sound islands to prevent shifting and damage.
- Proper planning, durable material selection, and accurate installation of kitchen island seating create years of comfortable dining and a welcoming gathering space.
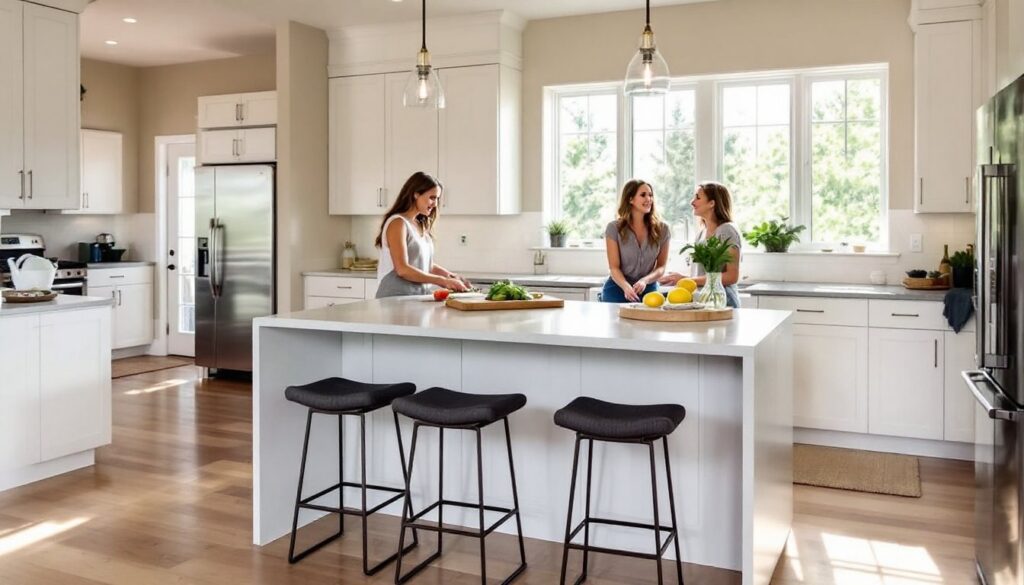
Why Kitchen Island Seating Matters for Modern Homes
Kitchen islands have shifted from purely functional prep stations to social hubs. Seating transforms how your family interacts during meals and cooking. It eliminates the barrier between the cook and guests, making meal prep less isolating and meal times more inclusive.
From a practical standpoint, island seating extends your dining capacity without claiming dedicated space. In smaller homes, a three-seat island often replaces the need for a separate breakfast nook. Resale appeal matters too, homes with well-designed islands and seating typically command higher prices. Buyers view it as a luxury feature that adds both function and finish to the kitchen.
The challenge lies in balancing ergonomics with available space. Wrong seating heights, insufficient leg room, or materials that can’t handle kitchen heat and moisture lead to frustrated DIYers and unusable seats within months. Getting these details right upfront saves money and keeps your island the gathering spot it’s meant to be.
Types of Kitchen Island Seating Options
Stools and Bar Seating
Bar stools are the most popular choice for island seating because they’re flexible, removable, and come in endless styles. Counter-height stools (typically 24–26 inches from seat to floor) sit under a standard 36-inch counter. Bar-height stools (30–32 inches) work with 42-inch overhang counters and create a taller, more contemporary look.
When shopping for stools, check whether you want a backrest (more comfortable for lingering) or a backless design (cleaner look, easier access). Swivel bases make islands feel more casual and interactive. Footrests are essential for comfort if your stools are taller than 24 inches, without them, feet dangle and cause leg fatigue.
Materials range from metal frames with upholstered seats to wood, plastic, or woven options. Metal withstands moisture better than bare wood, which can warp in humid kitchens. A curated collection of stylish, functional stool options is available through design-focused retailers that specialize in kitchen seating.
Bench and Built-In Seating
Benches offer a more permanent, sometimes rustic aesthetic. They can seat two or more people and work especially well on one side of the island while stools occupy the other. Fixed benches are bolted to the floor and island: they don’t shift or require cleanup.
Built-in benches with storage underneath maximize space in smaller kitchens, drawers hold linens, cookbooks, or kitchen gadgets. The trade-off is commitment: removing or relocating a built-in bench requires effort and repair work.
Bench cushions add softness and can be removed for cleaning. Quality outdoor or kitchen-grade fabric resists moisture and staining far better than standard upholstery. If you’re a DIYer considering a custom bench, free woodworking plans and detailed instructions are widely available to help you build sturdy, custom barstools that match your island’s exact dimensions and style.
Measuring Your Space for Proper Island Seating
Before buying or building, take precise measurements. Most countertop overhangs are 12–15 inches, standard for casual dining and comfortable leg room. Measure from the island edge to where the seating will begin: ideally, your stool seat should land 10–12 inches from the counter overhang’s edge.
The magic number is 36 inches of floor-to-overhang clearance. This allows someone sitting on a standard counter-height stool to fit their legs underneath without cramping. Bar-height counters (42 inches) require bar-height stools and 42 inches of clearance. Anything less feels cramped: anything more looks awkward.
Count how many stools fit along one side. A typical rule of thumb: allow 24–30 inches per seat (stool width plus spacing). On a 4-foot overhang, you’ll fit two stools comfortably: a 6-foot overhang accommodates three. If spacing feels tight, reduce the number rather than cramming them in, uncomfortable seating gets ignored.
Account for walkway space behind the stools. Kitchen traffic still needs to flow: six feet of clearance between your island and the cabinets behind it keeps movement smooth. Anything less becomes a collision course during meal prep.
Choosing Materials and Finishes That Last
Kitchen island seating takes daily abuse: spills, humidity, heat from the stovetop, and constant use. Material choice determines whether your seating holds up or deteriorates within a year.
Metal frames (steel, aluminum, iron) resist moisture and are easy to wipe clean. Powder-coated finishes last longer than painted ones, powder coating creates a thicker, more durable skin. Stainless steel costs more but looks professional and doesn’t rust.
Wood seats and backs look warm and inviting but need protection. Seal bare wood with a water-resistant finish (polyurethane or conversion varnish). Unseal wood warps, stains, and splinters under kitchen conditions. If building custom stools yourself, hardwoods like oak or maple hold up better than softwoods like pine, though both need sealing.
Upholstery should be kitchen-grade fabric or vinyl, standard upholstery absorbs spills and mildews. Performance fabrics (like those used in marine or outdoor furniture) resist stains and moisture. Leather is forgiving for spills but can crack in dry kitchen heat. Budget extra for quality upholstery: a worn seat is far more visible than worn legs.
Concrete or composite countertops pair well with modern stools: granite or marble counters suit traditional seating styles. Match finish tones, black hardware suits contemporary kitchens, while brushed nickel works with transitional designs. Mismatched materials look disjointed and date faster.
Installation and DIY Tips for Kitchen Island Seating
Installing island seating depends on your choice. Stools are the easiest: measure, set in place, and adjust. Built-ins require fastening and potentially carpentry skills.
For stools: Use a level to ensure the island counter is flat before positioning stools. Uneven floors? Shim the stools or counter, don’t live with wobbly seating. If securing stools to prevent shifting (common in homes with kids or pets), use lag bolts through pre-drilled holes into the countertop substrate. Aim for solid cabinetry underneath, not thin veneer, bolts pull through veneered surfaces over time.
For built-in benches: The island itself must be structurally sound. If your island is a base cabinet, bolting a bench frame to it is straightforward. If it’s a peninsula or standalone island, ensure proper support, a bench adds concentrated weight that unsecured bases won’t handle. Use 2×4 lumber for the frame (actual dimensions: 1.5″ x 3.5″) and secure with 3-inch wood screws or bolts. Countertop screws (pocket-hole joinery) look cleaner but require a jig.
Seat height matters for comfort. Standard counter-height benches sit at 24–26 inches from the floor. Bar-height runs 30–32 inches. Measure twice, a poorly sized bench is a functional failure.
For cushions, use high-density foam (at least 4 inches) that won’t flatten after a few months. Wrap it in kitchen-grade fabric and secure underneath with a staple gun. Removable covers (with zippers or velcro) make cleaning easier.
Always wear safety glasses when using power tools, and use work gloves when handling pressure-treated lumber or rough-cut wood. If your island requires reinforcement or structural changes, consult a carpenter, structural mistakes aren’t worth the risk.
<h2 id="” data-id=””>Final Thoughts
Kitchen island seating isn’t just about filling empty space, it’s about creating a functional, welcoming gathering point in your home. Take time measuring, choose durable materials suited to kitchen conditions, and don’t rush installation. Done right, your island seating becomes one of the most-used and appreciated features in your kitchen. Whether you go with simple stools or a custom built-in bench, proper planning and honest material choices mean years of comfortable dining ahead.