Table of Contents
ToggleA kitchen island transforms both function and flow. It’s the difference between a cramped, one-cook galley and a space where multiple people can prep dinner without bumping elbows. Whether you’re renovating from scratch or adding to an existing kitchen, an island gives you extra counter space, storage, and a natural gathering point. But designing and installing one isn’t just about picking something pretty, it’s about fitting it into your space without blocking workflow or creating a bottleneck. This guide covers what islands do, the styles that work, how to plan your layout, and what features actually matter for your cooking habits.
Key Takeaways
- A kitchen island transforms both workflow and usable space, providing extra counter area, storage, and a natural gathering point—even 3×2 ft islands work well in smaller kitchens when positioned strategically around the work triangle.
- Modern islands feature clean lines and waterfall countertops ($30–$60 per linear foot), while farmhouse islands emphasize warmth with reclaimed wood and butcher block, requiring regular maintenance and thoughtful styling to prevent visual clutter.
- Proper island placement requires at least 42–48 inches of clearance on all sides, avoidance of blocking the stove-to-sink workflow, and careful consideration of electrical and plumbing costs ($500–$1,500+) if adding utilities.
- Popular kitchen island features include seating with bar-height stools, deep storage drawers with soft-close hinges, integrated cooktops or sinks, and optional luxury additions like beverage coolers—prioritize features based on your actual cooking and entertaining habits.
- DIY installation works for prefabricated islands with careful floor leveling and base positioning, but electrical wiring and plumbing require licensed professionals to ensure code compliance and safety.
- Account for door swings, measure clearances multiple times before installation, and invest time in planning to avoid costly retrofits and ensure your island enhances rather than interrupts kitchen workflow.
What Is a Kitchen Island and Why You Need One
A kitchen island is a standalone counter unit, typically 3 to 5 feet long and 2 to 3 feet deep, positioned in the center of the kitchen workspace. Unlike a peninsula (which connects to cabinetry on one side), an island floats free on all sides, creating a true workstation. Islands serve multiple purposes: extra prep surface, additional storage via cabinets or drawers underneath, seating for casual dining or gathering, and improved traffic flow when designed correctly. They’re not just visual anchors, they solve real problems. In smaller kitchens, an island can nearly double usable counter real estate. In larger kitchens, it breaks up the empty feeling and defines zones. Homeowners often skip islands thinking they need massive square footage, but even a 3×2 ft island with a two-seat overhang works well in a 120 sq ft kitchen if placed strategically. The key is planning around the work triangle (stove, sink, refrigerator) so the island enhances rather than interrupts your workflow.
Popular Kitchen Island Styles and Designs
Modern and Contemporary Styles
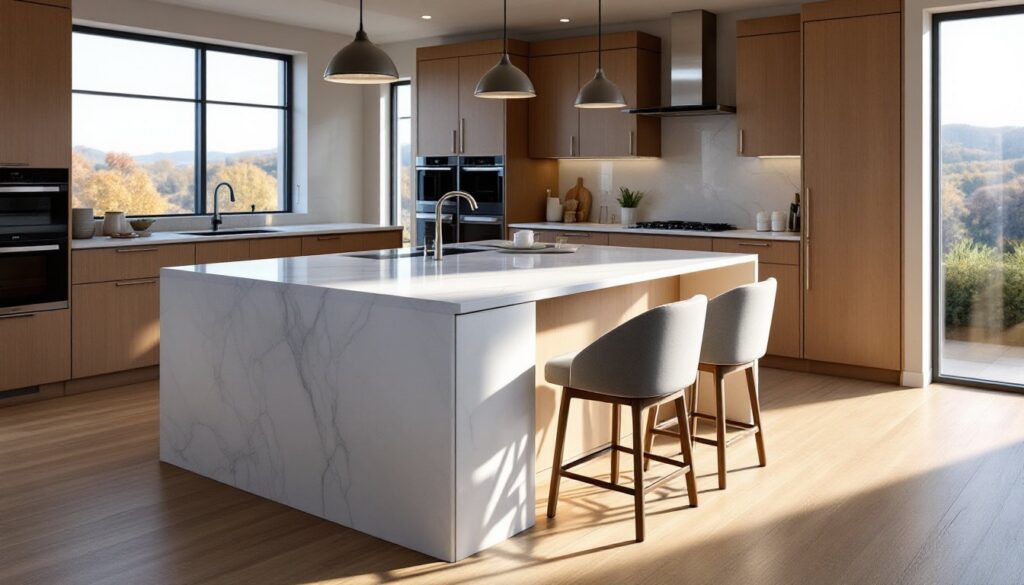
Modern islands lean on clean lines, minimal ornamentation, and integration with cabinetry. Think waterfall countertops (where the countertop material wraps down the side of the island in one continuous piece), flat-panel cabinet doors, and underscore hardware or no hardware at all. Waterfall edges add polish and cost, typically $30–$60 per linear foot extra for fabrication, but they’re worth it if you want a cohesive look. Many contemporary islands include integrated appliances, a cooktop, wine fridge, or even a sink, blurring the line between island and built-in workstation. Neutral colors (whites, grays, black, natural wood) dominate, often paired with matte finishes that hide fingerprints. Pendant lighting hung 30–36 inches above the counter reinforces the modern vibe. If you’re drawn to the sleek aesthetic, plan for open shelving on one side and closed storage on the other to balance clean looks with practical hiding of clutter.
Traditional and Farmhouse Islands
Traditional and farmhouse islands embrace detail and warmth. Raised panel cabinet doors, turned legs, and decorative molding signal a more classical approach. Farmhouse specifically gravitates toward reclaimed or distressed wood, often paired with white painted cabinetry, butcher block countertops, and wrought iron hardware with vintage patina. These islands feel substantial and can anchor a kitchen with real character. Butcher block, while lovely, requires regular oiling (every few months) and is softer than granite or quartz, so plan for dents and marks that some people love and others eventually replace. Farmhouse islands often include open shelving for displaying cookbooks or dishware, which adds charm but demands organization. Proportionally, these islands tend to be slightly larger and taller (36 inches is standard, but farmhouse styles often go 38–42 inches for a sturdier feel). Resources like home design inspiration at The Kitchn showcase countless examples of both styles in real kitchens.
Layout Considerations and Space Planning
Before buying or building, measure twice and visualize thrice. The golden rule: islands need at least 42 inches of clearance on all sides for a single cook to move freely: 48 inches is better if two people will work simultaneously. Measure from the island edge to cabinets, appliances, or walls. If you’ve got exactly 40 inches, a smaller island (2.5 feet deep instead of 3 feet) might fit. Positioning matters enormously. Avoid placing the island directly between the stove and sink, that blocks the primary work zone. Instead, angle it slightly or position it to the side, creating an L or U-shaped flow. In open-concept homes, an island bridges the kitchen and living space beautifully, but ensure traffic from entry doors isn’t routed through your prep zone. Electrical and plumbing are non-negotiable if you’re running a cooktop, sink, or wine fridge. Running new circuits or drain lines under the floor or through the island base costs $500–$1,500 depending on complexity and local labor rates. If your island has these utilities, work with a licensed electrician and plumber, this isn’t a DIY shortcut. Resources like kitchen design guides break down real layouts that prove the point. Finally, account for door swings. Your island shouldn’t block the path of a refrigerator, oven, or dishwasher door when fully open.
Essential Features and Functionality Options
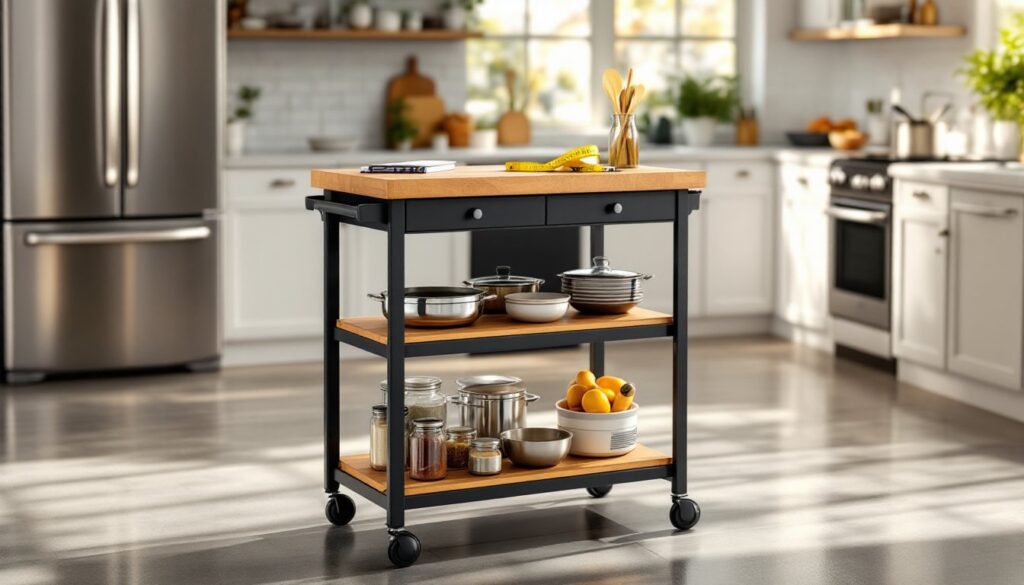
Seating is the most popular island feature. A 2–3 ft overhang on one side comfortably seats two to three stools: bar-height stools (24–26 inches for a 36-inch counter) are standard. Ensure headroom, 36 inches minimum from seat to soffit or pendant light. A sink island is convenient for prep and entertaining but demands proper plumbing and a deck-mounted or undermount faucet rated for island use. Storage is where islands justify their cost. Deep drawers (12–15 inches) beat shallow ones for storing pots, pans, and linens. Soft-close hinges and drawer glides ($40–$80 per drawer) prevent slamming and wear, worth the upfront investment. Open shelving creates visual airiness but demands curated styling, mismatched mugs and stacks of takeout containers look chaotic. A cooktop on the island improves flow if your stove currently occupies a wall, though you’ll need a venting hood or downdraft system above ($600–$2,500). Electrical outlets integrated into the island countertop (pop-ups or retractable designs) power small appliances without cluttering the surface. A wine fridge or beverage cooler brings entertainment value: these are luxury additions starting around $400–$800. Not every feature belongs in every kitchen. Prioritize what you actually cook and entertain with, not showroom fantasies.
DIY Installation and Renovation Steps
A prefabricated island or simple cabinet base can be a DIY project: complex custom work with plumbing and electrical typically requires professionals. Here’s what a basic install looks like:
Materials & Tools Checklist:
- Island base (pre-built cabinet, custom cabinetry, or stock kitchen cabinets)
- Countertop (laminate, solid surface, butcher block, stone, or quartz)
- Wood shims and construction adhesive (Liquid Nails or similar)
- Circular saw, drill, level, measuring tape, stud finder
- Shims, lag bolts (if anchoring to floor)
- Paint, stain, or finish as needed
- Safety gear: safety glasses, work gloves, dust mask
Steps:
-
Prepare the floor. Clear the space and ensure the floor is level: high spots will throw off your island alignment. Use a level on a long straightedge and note any deviations. Shimming under the base corrects minor issues: significant slopes require floor repair first.
-
Position and dry-fit the base. Set the cabinet base in its final location. Check for level in all directions, front to back and side to side. Adjust with shims underneath as needed. Confirm clearance to surrounding cabinetry and appliances (measure twice).
-
Secure the base. If the island will see daily activity and heavy use, anchor it to the floor using lag bolts drilled through the cabinet frame into the subfloor. Pre-drill to avoid splitting wood. This prevents shifting and is especially important in kitchens with young kids or frequent entertaining.
-
Countertop installation. Laminate and solid surface counters can be DIY with the right tools, a circular saw with a fine-toothed blade cuts cleanly from the underside to hide chipping. Stone or quartz typically require professional templating and installation, though small islands might be simpler. Verify countertop overhang (typically 10–15 inches on seating sides) before the counter is installed. Adhesive and clamps hold the countertop: follow the fabricator’s instructions if using a pro.
-
Finish work. Sand, stain, or paint the base cabinet if it’s unfinished wood. Apply two coats of polyurethane over stain for durability: kitchen cabinetry takes abuse. Attach trim or crown molding if the design calls for it. Install hardware, drawer pulls, and soft-close mechanisms per instructions.
-
Utilities (if applicable). Running electrical to island outlets or installing plumbing for a sink demands a licensed electrician and plumber in most jurisdictions. This isn’t a cost-cutting shortcut, code compliance and safety are non-negotiable. Expect $1,500–$3,000+ depending on distance and complexity.
The hardest part isn’t assembly, it’s the prep. Ensure floors are level, walls are square (kitchen walls often aren’t), and you’ve accounted for every electrical, plumbing, and structural detail before you start. A few hours spent measuring and planning prevents days of retrofit headaches.