Table of Contents
ToggleReplacing an electrical outlet is one of those projects that looks scary until you actually do it. A worn-out outlet, one that won’t hold a plug, sparks, or feels warm to the touch, is both a safety hazard and a signal that it’s time for a swap. The good news: you don’t need an electrician for a straightforward replacement on a standard 15- or 20-amp outlet. This guide walks you through the process step-by-step, covering safety first, the tools you’ll need, and exactly how to wire a new outlet correctly so it works reliably for years.
Key Takeaways
- Always turn off power at the breaker and confirm it with a non-contact voltage tester before starting any outlet replacement work.
- Match the amperage of your new outlet to the old one (15-amp or 20-amp) and connect wires correctly—black (hot) to brass, white (neutral) to silver, and bare copper (ground) to green.
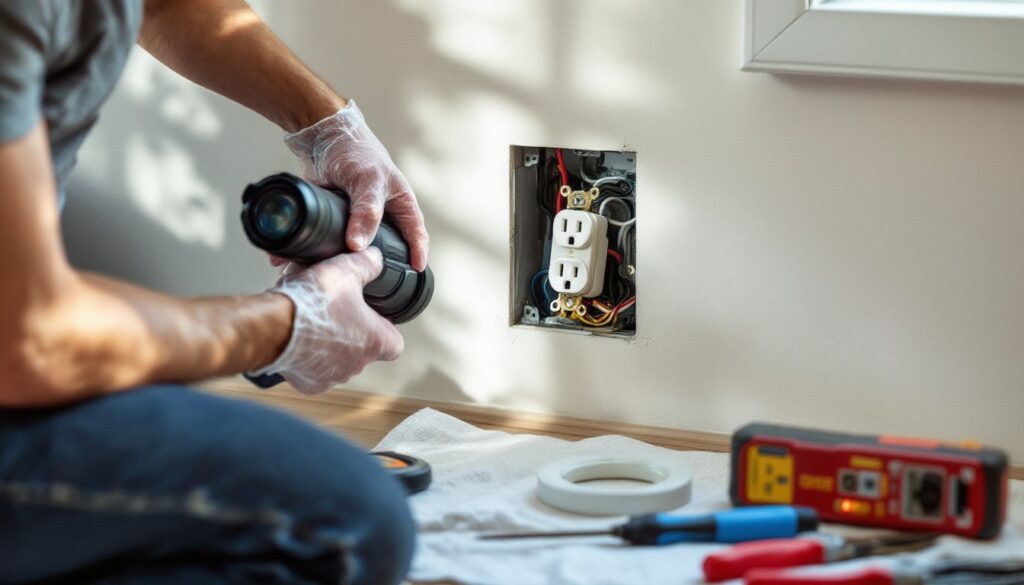
- Photograph the original outlet before disconnecting wires to prevent reversing hot and neutral connections, the most common DIY mistake when replacing outlets.
- Inspect wire insulation for damage or discoloration; if present, strip back ½ inch to expose fresh copper and straighten wire ends into a clean ⅜-inch loop.
- GFCI and AFCI outlets are required in kitchens, bathrooms, garages, and outdoor areas—replace them with the same type rather than standard outlets to maintain code compliance.
- Stop immediately and call a licensed electrician if you encounter corrosion, burn marks, a tripped breaker, damaged wiring, or feel uncertain about the replacement process.
Safety Precautions Before You Start
Electrical work demands respect. Before you touch anything, kill power to that outlet at the breaker panel. This isn’t optional, it’s the difference between a minor project and a hospital visit. Find the breaker labeled for that outlet (or the room if outlets aren’t individually labeled), flip it off, and test the outlet with a non-contact voltage tester or a plug-in tester to confirm power is dead. Flip the breaker back on briefly to double-check you have the right one, then flip it off again and leave it off during the entire job.
Wear safety glasses to protect your eyes from dust and small wire clippings. If you’re working in an older home or disturbing old insulation, use a dust mask. Keep one hand in your pocket while testing with a voltage tester, this limits the path electricity can take across your chest if something goes wrong (a basic precaution electricians use). Never work wet, never work standing in water, and if you see corrosion, burn marks, or smell burning plastic near the outlet, stop immediately and call a licensed electrician. Some outlets are on GFCI (ground-fault circuit interrupter) or AFCI (arc-fault circuit interrupter) protected circuits: replacing these requires the same steps, but they’re slightly bulkier and more expensive, check your old outlet before shopping.
Tools and Materials You’ll Need
Keep your toolkit minimal but complete. You’ll want a non-contact voltage tester (around $10–15, worth every cent for safety), a flathead screwdriver and a Phillips screwdriver (or a multi-bit screwdriver), and a pair of needle-nose pliers to help you straighten wire ends and remove outlet clips if needed. A wire stripper (25–30 cents of insulation per wire) is handy if wires are damaged, though you shouldn’t need it for a standard swap.
For materials, grab a standard 15-amp or 20-amp duplex outlet (about $1–3 for a basic model, more for tamper-resistant or surge-protected versions). Check your old outlet’s amperage, it’s marked on the face. If it’s 20-amp, buy a 20-amp replacement: if it’s 15-amp, a 15-amp works fine (you can’t use a 20-amp outlet on a 15-amp circuit, but 15-amp outlets are safe on 20-amp circuits). You’ll also want electrical tape to seal wire connections if you’re not using a wire nut, though modern outlets typically don’t require this for in-box connections.
A small flashlight or headlamp is genuinely helpful, breaker panels and outlets are often in dim corners. If the outlet box is recessed or the existing wires are damaged, you might need a shallow or deep electrical box extender (a few dollars), but most standard replacements don’t.
Step-by-Step Outlet Replacement Process
Testing and Turning Off Power
Locate the correct breaker and flip it off. Using your non-contact voltage tester, touch the outlet’s face and plug holes, the tester should show zero volts or no light. Plug a lamp or phone charger into the outlet as a double-check: nothing should power on. This step takes 30 seconds and eliminates almost all risk. If you’re unsure which breaker controls the outlet, turn one off, test the outlet, and if it still has power, turn that breaker back on and try the next. Leave the correct breaker off for the entire job.
Removing the Old Outlet
Unscrew the faceplate (the trim ring) and set it aside. You’ll see two terminal screws, one brass (hot wire) and one silver (neutral wire), and possibly a green screw (ground wire). Before you disconnect anything, take a photo with your phone. This reference prevents reversed wiring, which is the most common DIY mistake.
Loosen the brass terminal screw counterclockwise and gently pull the wire free. Don’t yank: wires in older homes can be brittle. Repeat for the silver and green screws. If wires are wrapped around the screw multiple times, use needle-nose pliers to carefully unwrap them. Once all three wires are free, unscrew the outlet from the electrical box (the metal or plastic housing in the wall) and slide it out. Set the old outlet aside: you can recycle or discard it.
Inspect the wires. The insulation should be intact and the bare copper or tin should be shiny, not corroded or blackened. If wire insulation is cracked or wires are discolored, strip back about ½ inch of insulation with a wire stripper, exposing fresh copper. Straighten the wire ends with pliers so they form a clean ⅜-inch loop (this fits properly under the screw terminal).
Connecting the New Outlet
Hold the new outlet face-up in front of you. The brass screws are on the right (hot), the silver screws on the left (neutral), and the green screw at the bottom center (ground). Insert the loop of the hot wire (typically black, or red in older homes) under the brass terminal screw on the right side. Tighten the screw clockwise until the wire is snug and the loop is nearly closed, don’t over-tighten, which strips the wire. Repeat with the neutral wire (white) under the silver screw on the left, and the ground wire (bare copper or green) under the green screw at the bottom.
Double-check: hot (black) to brass, neutral (white) to silver, ground (bare) to green. If wires are reversed, the outlet will work but may create a shock hazard. Once all connections are tight, gently fold the outlet into the box, don’t bend wires sharply. Screw the outlet to the box using the screws provided (usually pre-installed in modern boxes). Screw on the faceplate and you’re done. Flip the breaker back on, and test the outlet with a lamp or phone charger to confirm it works.
If you’re replacing a two-gang or three-gang outlet box (multiple outlets side-by-side), or if existing wires are damaged beyond a quarter-inch of bare copper, this is a good time to call a licensed electrician. Damaged wiring or cramped box conditions can create safety issues that aren’t worth rushing.
Common Issues and Troubleshooting
Outlet won’t turn on after replacement. First, flip the breaker off again and double-check your connections, especially that hot and neutral aren’t swapped. Confirm the breaker itself isn’t tripped: flip it fully to ‘off’ and back to ‘on.’ If it trips immediately after, there’s a short circuit in the line: stop and call an electrician. If the outlet still doesn’t work and breaker doesn’t trip, check a nearby outlet on the same circuit to rule out a house-wide power loss.
Wire won’t fit under the screw terminal. Wires that are too thick or the wrong gauge shouldn’t be on a 15-amp or 20-amp circuit in the first place. Standard household outlets use 14-gauge or 12-gauge wire: if your wires are thicker, you may have the wrong outlet type or a mismatched circuit. Stop and verify the breaker amperage matches the wire gauge. The National Electrical Code (NEC) requires 12-gauge wire on 20-amp circuits and 14-gauge on 15-amp circuits.
Outlet is loose or wiggles. The box may be damaged or the outlet screws aren’t tight enough. Tighten the outlet’s fastening screws. If the box itself is cracked or stripped, it may need replacing, a job best left to an electrician if you’re not comfortable removing the old box and installing a new one.
You’re unsure whether the outlet is GFCI or AFCI protected. GFCI outlets have ‘Test’ and ‘Reset’ buttons and protect against ground faults (wet areas). AFCI outlets have similar buttons and prevent arc faults (dangerous arcing). If your old outlet had these buttons, buy a replacement GFCI or AFCI outlet and wire it the same way. Standard outlets are cheaper but shouldn’t replace GFCI/AFCI outlets in kitchens, bathrooms, garages, or outdoors, these require specific protection by code.
For a more detailed technical walkthrough, resources like detailed outlet replacement guides offer additional images and variations. If at any point you feel uncertain about the wiring, power loss, or structural issues, stepping back and consulting a licensed electrician protects both your home and yourself, there’s no shame in that call.